May 3, 2015
Before we get into more technical stuff, here’s a great video from last summer in Labrador. One of our cruising partners had a quad-copter drone which he could launch and retrieve from his boat and this video has some great aerial shots of the boats and icebergs. Sadly the drone is not amphibious.
Now for more on our maintenance. This update will cover all the electrical projects we have completed. We worked with the crew at Offshore Marine Electronics – Steve, Clayton, Buddy, Fran, Scott, Beth, and Sue who, after working on lightning strike repairs and other projects over the past few years, are now like family. The next updates will cover engine work and interior upgrades.
Electrical
- Starboard engine room alcove – replace two open terminal strips with proper junction boxes and attempt to label wires.
- Port engine room alcove – install marine grade Junction box with terminal strips and move open splice wires in box. (Note rerun some of the wire runs.) We continued to make progress and of course Murphy paid us a visit, but it was very fortuitous. We were installing at junction box in port engine room alcove, where 5 wire runs were just spliced together, including some 120V. We wanted to reroute some of them and install a junction box. To do that we had to move Jabsco bilge pump and in the process the brass outlet barb broke off. It was very pink, meaning the bronze has leached out and it has lost its strength. So it would have been just a matter of time until it failed. Although they sell new bases with the inlet/outlet barbs, the price was $250 and our suppler offered to construct a new 24V unit for only $550, so we went with that. While we do carry many spare parts and one complete spare pump, the 24 V is no longer manufactured. This is the primary shaft bilge pump and was 10 years old. Other than replacing the internal valves a few times, it has been reliable and now should be in good shape for a long time to come.

Bradley and Clayton review electrical drawings
- Review some grounding questions. This turned out to be a very complex discussion that ended up involving Steve D’Antonio, our electrician Steve Gilpin and Keith our MTU (Detroit Diesel) expert. In the end, we ended up adding some grounding wires to some Stainless Steel fittings in our raw water hose runs. We also ended up changing some existing grounding runs from series to home runs to new grounding terminals. All of our through hulls had been daisy chained together and run back to a grounding brush on the shafts. They now connect directly to new grounding terminals, one each port and starboard.
- Lazarette – small exhaust Fan. This was a combination enhancement and preventive maintenance. It is the original fan and was showing lots of signs of wear. We also added a temperature switch so that it can run in Auto mode, rather than having to remember to turn it on or off.
- Pilot House VHF – when we run our hydraulic alternators we get noise through the Pilot house VHF. We are installing some noise suppression to eliminate the annoying whine.
- Upgrade Alternators on main engines from 100 to 175 – 225 range. This turned out to be an extremely complex issue and in the end we ended up deciding not to proceed with this project. The key challenge was running some 2.0 wire (about the size of your thumb) to some existing switches.
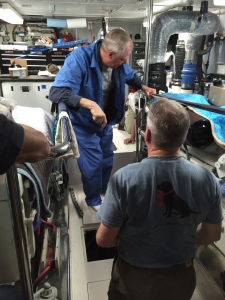
Clayton and Bradley discuss options for alternators
- Replace all house batteries. This was covered in a separate post, but after the new batteries were installed, we had to reset our Mastervolt system and ensure all settings were correct and all chargers were working properly. This involved several interactions with Mastervolt tech support and in the process, one of our chargers began making noises. It was just like the noise a prior charger had made when we suspected the fan was bad. So we ended up getting a new charger from Mastervolt and returning the noisy one – all under warranty, but of course creating a bit more work. To top it off, when the new charger arrived, one of the Silica Gel packets using in shipping to prevent moisture had broken open and the little beads had made their way into the charger where we could hear them rattling around. It took a bit of twisting and shaking to get them all out, plus some phone calls with Mastervolt to make sure that any stray ones would not cause a problem. In the end, everything was installed, testing, and working and we have a very good understanding of all the settings and how they work.
- Electrical Panel Meter Displays on our electric boards. We have been having issues with these digital gauges going bad since we purchased the boat. All of them were replaced after the lightening strike and they still were randomly going bad. We discussed with our electrician about adding a add resister. In the end, Kathy end up tracing down the original Manufacture in Taiwan, who took our old ones back, serviced them with some type of upgrade and returned them to us. We are hopeful this has solved the issues but more importantly, we now have a direct contact to the manufacturer in Taiwan who has been very responsive and helpful.

Digital panel meters that measure Voltage, Frequency, or Amps
- Spot lights (4) – 1 on Bow, 2 on Tender Deck & 1 on Stern. They continue to burn out after little or no use. We evaluated LED and instead decided to try one more solution and purchased special reinforced (Rough Service) bulbs. Time will tell.
- Replace engine room lights to conserve energy. We investigated LED options but it was not cost effective so we did not replace them.
- Battery Deck Ballast on Stbd light. Replace or convert to LED. We replaced as LED not cost effective in this configuration yet.
- Lazarette Ballast on Starboard light replaced.
- Upgrade lighting in Master Convert to LED to conserve energy. Of course this was more complex than hoped, as the LED we wanted to be consistent with the ones added after lighting strike were no longer available. We were able to come close and ran into problems with lights mounted in wood panel ceiling vs panels. Successful in the end.
- Upgrade Galley Lights. Convert to LED to conserve energy. Same challenges as above. Also had to find and swap out dimmers for lights.

New master cabin lights
- Master Head Light Switch replace – it was wearing out.
- Tender Upgrade Navigation System. We have an old NavNet system in the tender and the display is virtually impossible to see in daylight. We have limited space to install an alternative so decided to defer any changes for now given all the other projects we had in progress. We have purchased a BadElf GPS and waterproof case for our iPad and will use Garmin BlueChart on the iPad. That may turn out to be the best solution.
- Improve monitoring of key temperatures in Engine Room. In a perfect world we wanted to monitor in pilot house the following items: Exhaust Temperature just after water mixer, Shaft Temperatures and bilge pump cycles. Maretron makes a great system for doing this but we faced two significant challenges. (1) getting a wire from the engine room to pilot house computer and (2) over all cost of this system over $10K including installation. If building a new boat a Maretron system or similar would be installed. With Steve D’s guidance we ended up going with a simple Borel Manufacturing sensor that will monitor Exhaust Temperature on both engines, the most critical part, and dropping the other requirements. Total cost, including installation was less than $500.
- Tighten all Electrical connections and check for any signs of heat damage
We are approaching the end of the maintenance cycle and plan to launch the boat this week. Ready to get back to cruising!
-

- Steve and Bradley working on master cabin lighting
-
- Bradley readies new light fixture for installation
-

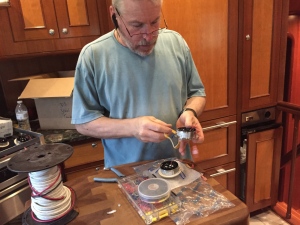
- Buddy tightens connections in power board
-

- Broken silica gel packet
-

- Silica beads in the packing bag – they also got into the new charger
-

- Exhaust temperature sensor mounted on exhaust in engine room
-

- Our new exhaust temperature sensor display/alarm mounted in Pilot House
-

- Alarms on our Mastervolt system
-

- Settings for our Mastervolt Shiunt
-

- Settings for our Mastervolt Chargers

#1 by Lindi Mallison on May 5, 2015 - 11:14 am
Awesome drone video!
I’m closing out my comcast email… (lamallison@ comcast.net) . Please change to my personal gmail address …hellolindi@gmail.com
Thanks! Lindi ‘n Key Largo
Sent from my iPad
>
LikeLike
#2 by Donald Fader on May 4, 2015 - 9:03 am
I met you folks a couple of weeks ago at Moore’s Marine and you were kind enough to show me around “Shear Madness”. I just read your post. You guys have an electrical diagram!!!! I thought everybody had to trace wires down with a multitester. Every time I look at your pictures I want to set my boat on fire so if you see a cloud of smoke from the Jarett Bay yard you’ll know I just couldn’t stand it anymore. Seriously, you and Bradley are doing some pretty work there. I know you will sleep better on the hook after all the maintenance and upgrades.
Don
LikeLike
#3 by Neil Spencer on May 3, 2015 - 6:07 pm
Giday
You know how much I enjoy reading your refitting blogs; as much as for general interest and wishing I was helping out. I read between every line!!
Very happy to see that you have got rid of the daisy chain grounding wiring; I doubt that this system is permitted under Classification Society rules; I was stunned to read that this system was fitted to your boat. Not now; I’m very happy.
Glad your back in the water soon. With all the work you have done I don’t think you will have anything left for next year – ah; but then it is a boat!!
All good here. V nice weather – it’s summer again and it’s supposed to be winter.
Neil & Suzy
_____
LikeLike
#4 by Anonymous on May 3, 2015 - 3:49 pm
Well, finally, something our boats have in common, the same exhaust gas temp alarm, great post, wish I was there the ‘help’
Kim
LikeLike
#5 by Darin Hayden on May 3, 2015 - 9:07 am
You two sure have been busy!
LikeLike